Updated July 22, 2021
Gardening has become my jam! My 2.5-year-old twins love to help me dig in the dirt and then put the plants we are going to grow into the garden box. This is something fun we’ve done together this summer that has made me so happy. We planted the garden together, now we water it together and soon we will harvest it together. A blogger friend of mine, Arezou, founder at Call Emmy considers gardening and planting seeds as fun activities for kids. She even says it is one of the best screen-free activities for kids in her recent blog. To learn more about other activities, check out her blog.
I started my real-life, planted in the ground garden during the lock-down time in 2020! Why the exclamation point?! Planting a garden isn’t that big of a deal, right?! Well…for me, it’s a HUGE deal. I love to get my hands dirty and plant things. I haven’t had space to actually plant flowers let alone a real live garden for many, many years. The exclamation point is because I’m so freakin’ excited about growing my own vegetables that our family can eat and we can share with others. Because I now have a garden and herb patch, so to speak, I needed garden markers so I know what vegetables and herbs I planted while they are germinating and growing. In this post, I show you how I easily made these garden markers using stuff I already had at home for zero dollars. You probably have the supplies needed to make these in your home too!
When we moved into our new house, the previous owner had this very scary-looking shade cover sail that was anchored by two metal beans that went up and over towards the house. The previous owner was a welder, so he welded this shade structure himself. When we were about to close on the house and still negotiating a few things, we asked him to remove the metal posts (they were at least 12 feet into the air and swayed in the wind big time) before we moved in. We didn’t think to ask him to remove the metal boxes that they were anchored in. I honestly thought we would be able to move them to a different part of the yard and use them as great garden and flower boxes. Little did I know until I recently cleaned them out that they are filled with heavy steel. That’s what kept the other part that he removed from crashing into the house. My mistake!
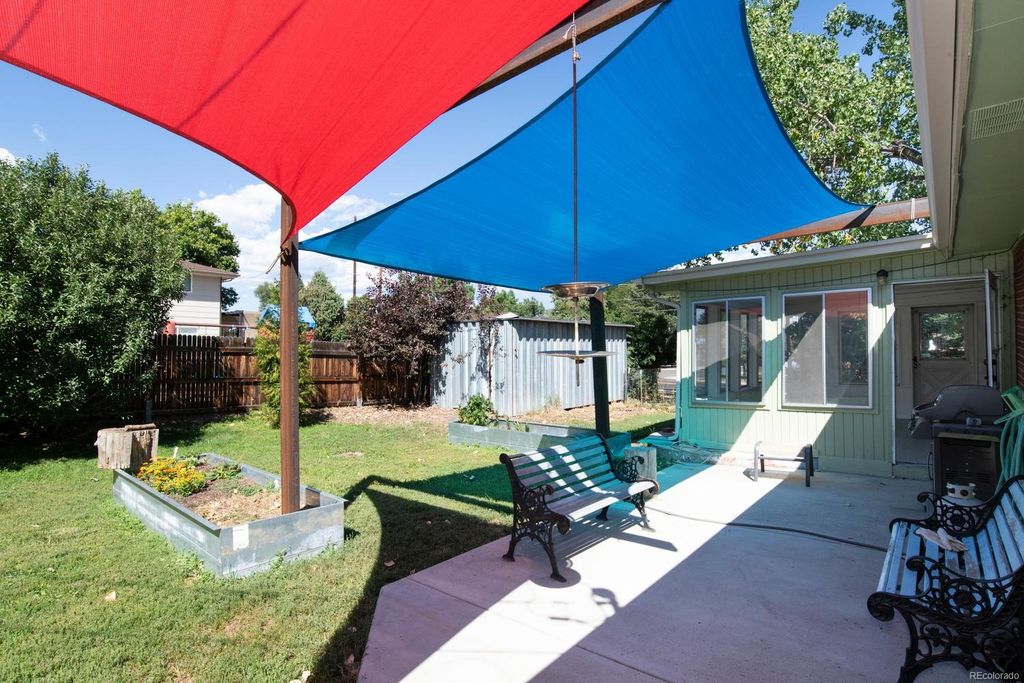
Original metal planter boxes that were attached to the house with heavy metal beam posts and shade sails. Super scary when the wind blew!
This is the garden I planted last year in one of the heavy metal boxes.
It turns out that they are way too heavy for us to move them ourselves and we don’t have the money to pay someone to move them for us or to rent a piece of heavy equipment to try to move them ourselves. Plus, honestly, I’d never trust myself or my husband to take on a project like that. I know we would either get hurt or crash something into our house. We aren’t skilled in this type of work, so I decided to make them work to the best of my ability right where they are.
Getting the garden beds ready has taken me some time. I spent most of the day last weekend, cleaning out both garden boxes and refilling them with garden soil. I turned one of the boxes into a flower bed and transplanted all of the flowers (they were spread between both boxes) into one and added a few more that I love. Zinnia’s and Marigold’s are two of my favorites because of the bright colors. An added benefit of planting Marigolds, supposedly squirrels and rabbits don’t like the way they smell so they won’t eat your other flowers. I sure hope this is true because I spent a lot of time planting really pretty flowers that I want to enjoy all summer long.
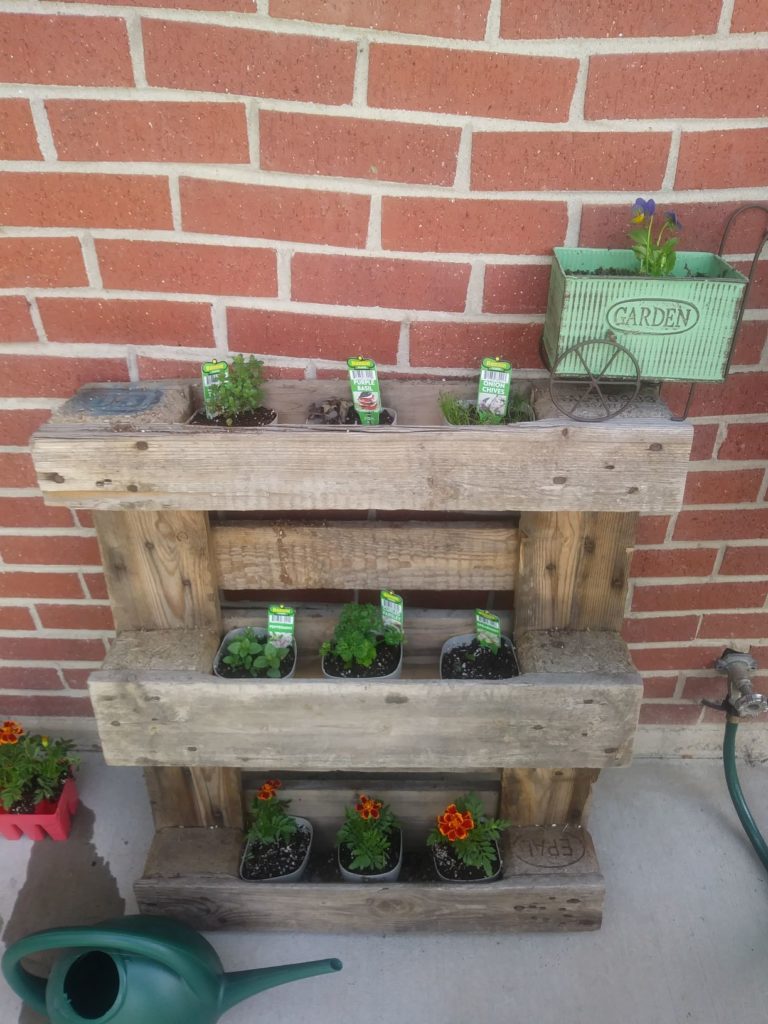
In the second garden box, I just cleaned it all out and refilled it with garden soil. A good friend of mine is gifting me some vegetables and herbs that she got started but ended up with too many once the seeds germinated. Thank you, Michelle! I’m planting the gifted and I bought vegetables and some herbs this weekend. I already planted some herbs in my pallet herb planter shown below. My good friend, Sarah, made this for me a few years ago and I still love it as much today as I did when she first made it for me. I have more herbs to plant than I had room in the pallet herb planter so I will add them to the garden this weekend. I love saying the word garden! ?
Since originally writing this article, we have, in fact, got rid of two of the heavy metal boxes. A nice couple really wanted them, so they came over and hauled them away. I hope they get lots of use and enjoyment out of them. I’m happy to have my yard back and not worry about my twins getting hurt by falling onto them or running into them.
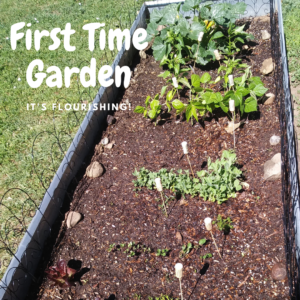
We only kept one box and with the help of friends (mostly strong guy friends) we moved one of the metal boxes to the back corner of our back yard. That is now where I have my flourishing garden. This year we (with the help of my toddler twins) planted Tomatoes ?, Zucchini, Squash, Bell Peppers, Peas, Carrots ?? and beets. Think of the yummy salads I will be making soon!

Our Garden in Full Flourish this year!
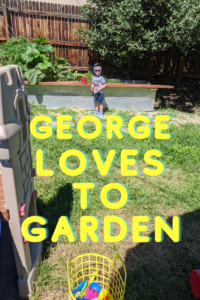 One of my twins LOVES to garden and get dirty!
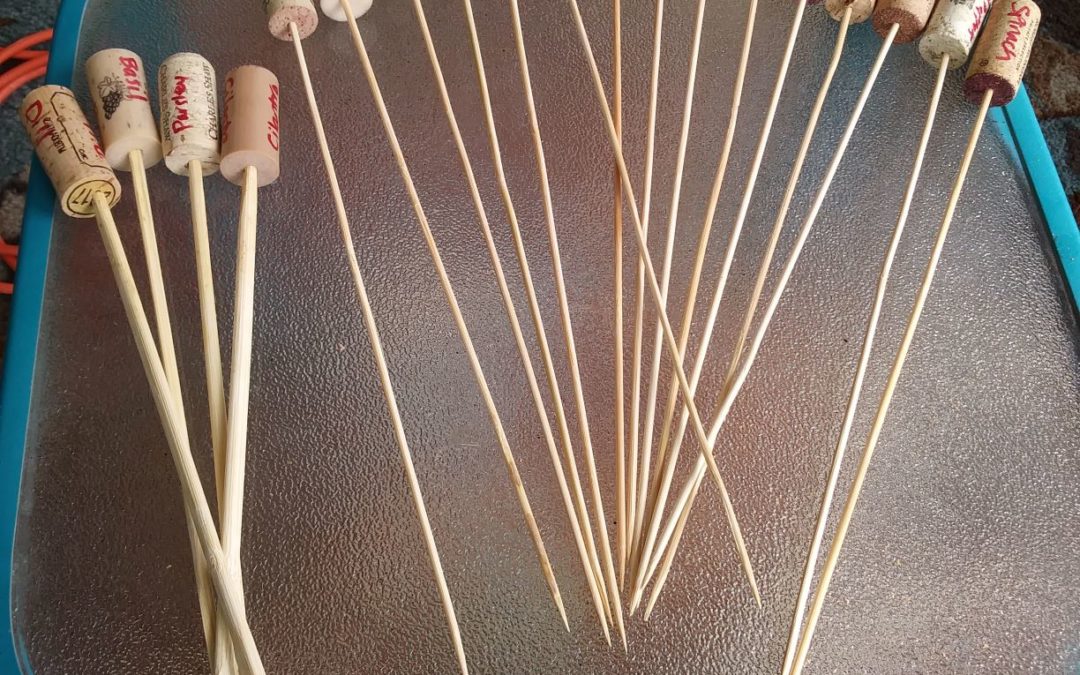
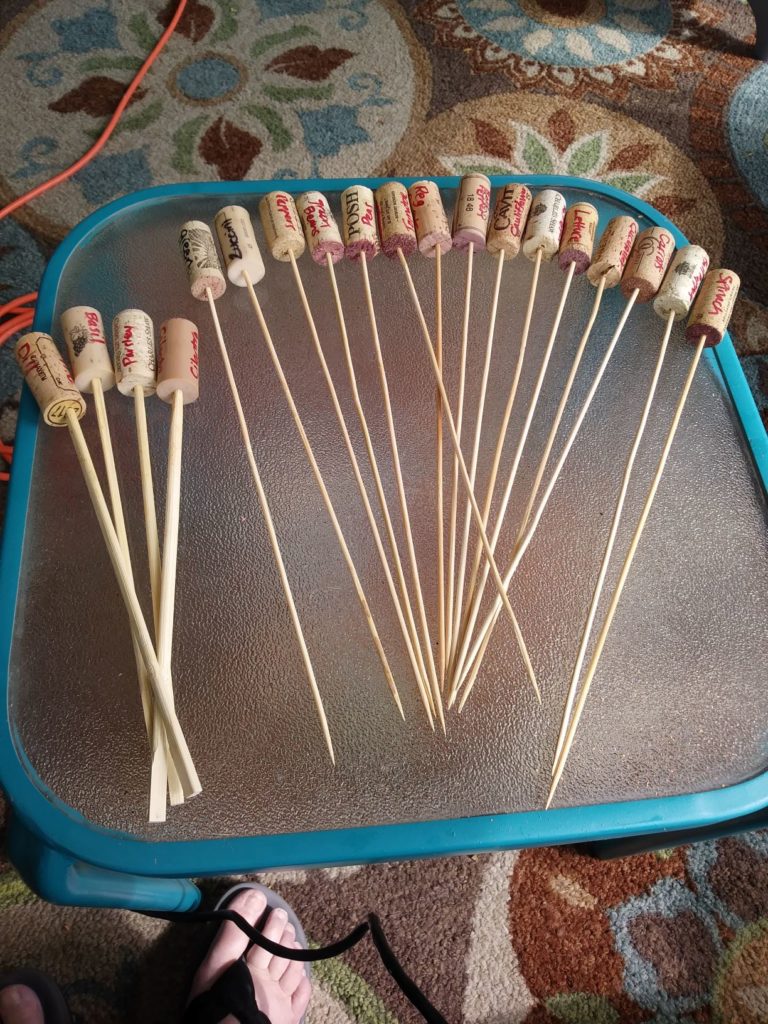
I got so excited about having space to actually plant herbs and vegetables, that I got off track for a minute. I am excited to show you how I made these really cute garden and herb markers out of things I already had at home. I didn’t buy anything for this project. I spent 0$ on the actual project (not including any gardening soil, herbs, or vegetables purchased for the actual garden) and that makes my husband very happy. He doesn’t like my DIY projects when they end up costing money. If I can do them for free, using things we already have on hand, he’s a very happy man! I did this project during nap time and it took me all of about 40 min’s to make 16 garden markers and 4 herb markers. They were super easy and fun to make!
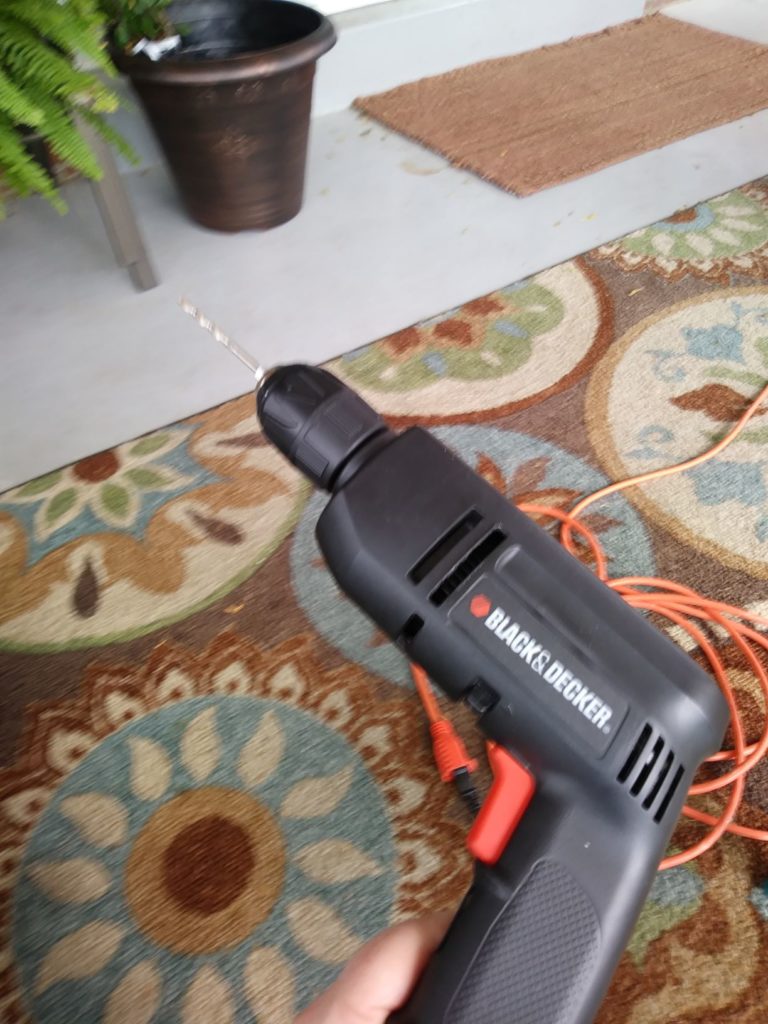
I got my drill out for this project. I love when I get to use power tools for a project. Here’s a photo of what I used and a list of the things I had on hand to make these:
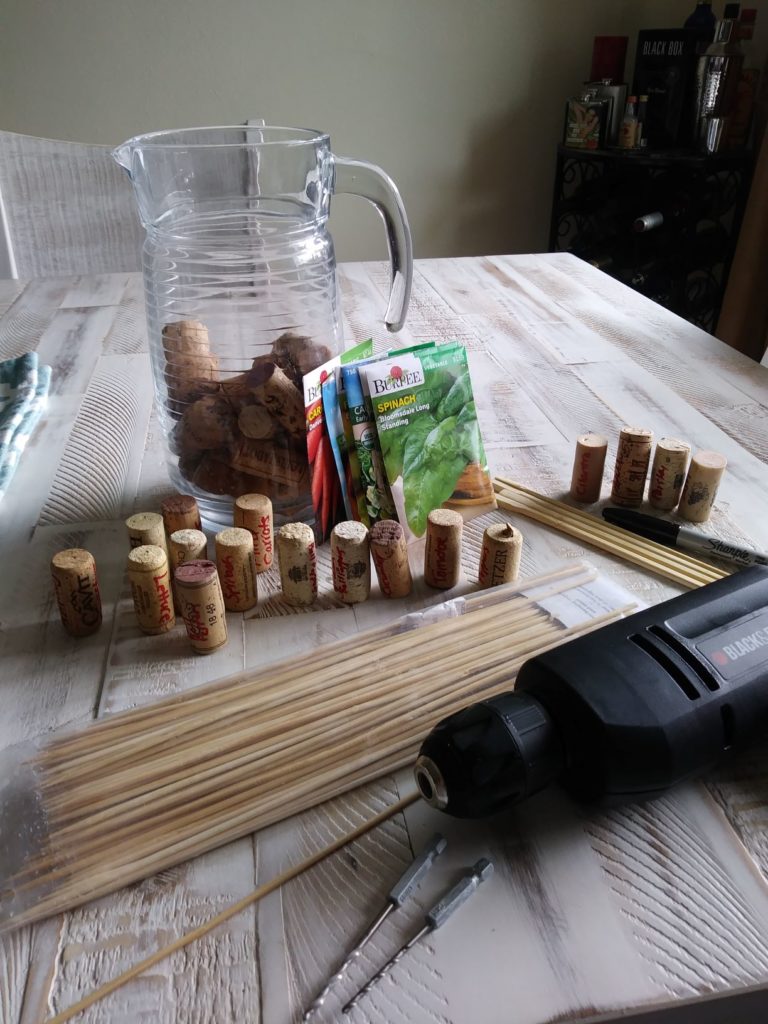
List of items that I already had on hand and used for this project:
- Wine corks – I save these and have been wanting to use them for a project, so I’m super excited that they went to good use for this one!
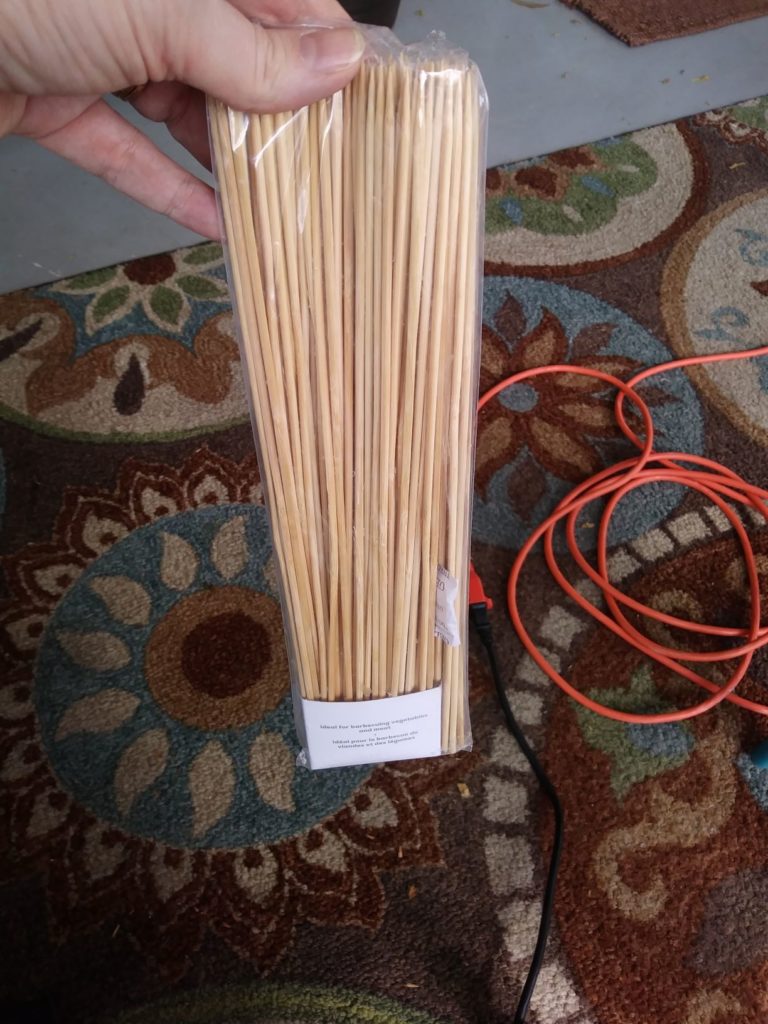
- BBQ Skewers – we had these in our drawer leftover from a dinner I made last summer.
- A Sharpie Pen – I used a red one for most of them but then did a couple in black to see the difference. I think I like red the best.
- My handy dandy drill – I love it when I get to use power tools even for just a few minutes!
How I made them & what I used:
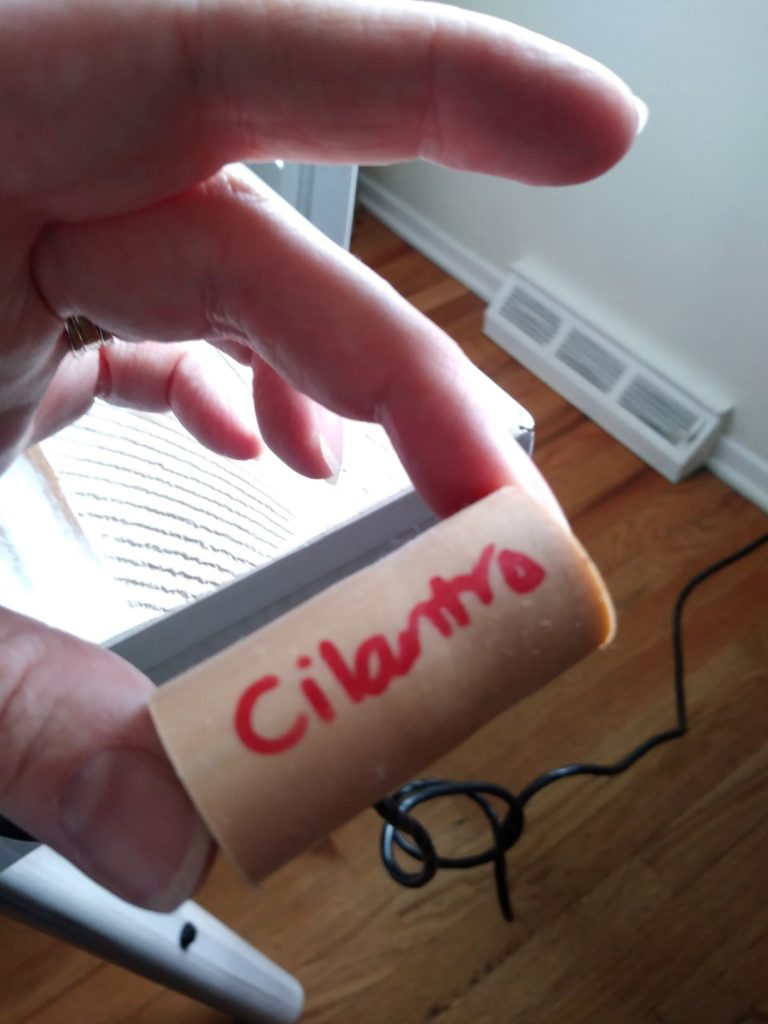
- First, write the herb name or vegetable on the corks
- Second, use the second smallest bit I have and drilled a hole into the end of the cord that had wine color on it or where the wine opener left its mark. I drilled about halfway through the cork to make sure the cork will stay on the skewer.
- Thirdly, insert the skewer into the hole I just drilled into the cork and I repeated this 15 times!
- I used the BBQ skewers for the garden markers and I used leftover unused chopsticks (from a recent Chinese food take-out order) for the herb markers. I didn’t think I needed the herb markers to be as tall as the garden markers. Once I get everything planted, I’ll see if this is true.
I love how these turned out so much that I’m going to make some as gifts for some friends. I’d love to see what you are working on outside, in your garden, or just in an hour or two when you have time to tackle a new project. If you make your own garden markers that resemble the ones I made above, please share a photo or note in the comment section below. I love to hear from my readers and connect!